Visuals are a fantastic tool, but they are not a magic wand. It takes time and patience to teach children and often the adults that work with them. Here are some suggestions to make introducing visuals easier.
Spend Extra Time with the Child’s Team
Demonstrate how the visuals work. Go through the visuals you are introducing, talking about how to use them. If you have time, it can be helpful for the child’s team to be actively involved in making the visuals. This can be from picking which visuals to use to physically creating the visuals. This tends to give the team members better insight into the purpose of the visuals, and you will get better buy-in. Also, members of a child’s team who spend most of their time with the child will often have great insight into what visuals should be included and how they should look. Obviously, there are logistical challenges but doing as much as a team can produce better outcomes in the end.
If you can spend time and use the visuals in real-time to model for the classroom staff, this can be very helpful. Once the child’s support team has a chance to use the visuals meet up with them. Go over anything that they have concerns about and answer any questions they may have. I usually recommend using the visuals for about three weeks before making any significant changes in the plan. This allows both the child and the child’s team to learn how to use the visuals. It also provides time for the visuals to become routine which will have better outcomes. During this time, you will need to spend more time checking in, problem-solving, and making minor changes to the plan.
Pre-teach visuals before you need them.
Children learn new skills or coping mechanisms when they are calm and in a good space to learn. Visuals, especially ones to support classroom functioning and behaviour, need to be introduced when they don’t need them. Showing or using a visual that a child is unfamiliar with when a child is angry, upset, or dysregulated often leads to more anger and dysregulation. It’s like talking at a student when they are dysregulated; they will not understand what you are saying.
If you are going to introduce visuals, introduce them when the child is not in that situation. For example, if you are going to teach a student to practice slow breathing when they feel angry, practice during a specific time (e.g., early in the morning). Then once a child is used to the routine, you can use it when they feel angry. In general, students respond better to visual strategies during times of stress, when they have learned the strategy in times of calm or the purpose of the visual.
Bake them into the students’ routines
In general, students respond well to routines. It makes the day more predictable, and it typically allows students to handle stressful or unpredictable events easier. Making visuals part of a child’s routine means that they will be used consistently, and visuals used consistently means that the visuals have a better opportunity to work.
Think about what routines you have in a day; you have more than you think. What visuals would be easiest to introduce into the different routines? For example, schedules are most easily used first thing in the morning and then again after lunch. Break visuals are best presented during pre-scheduled breaks. Teaching how to wash your hands’ visuals should be used when washing your hands.
Be Prepared to Confront Myths and Misconceptions Regarding Visuals
Just like the children we are supporting, the adults in the child’s life will also need to learn how to use the visuals. It can take more time than you may think. There are lots of preconceived notions about visuals. You may hear, “So and so doesn’t need visuals.” “Visuals are too much work.” “I don’t like the look of visuals,” aka “They’re not pretty.” “Visuals are too childish for this older student.” “We tried visuals for a week, and they didn’t work.” Some of these ideas can be very entrenched.
You are going to need to combat many of these ideas. Sometimes, it takes a long time. You may have to address these ideas/concerns over and over again. I also find demonstrating their use can be helpful. So if you are working with a child, make sure that you are using visuals. It may help break some of those myths, and it will teach the student how to use visuals and make more extensive implementation easier.
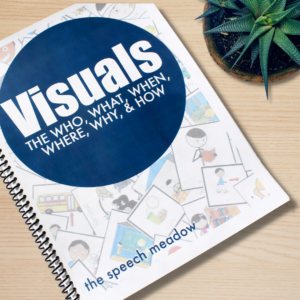
If you want to learn more about visuals, click here. For more information on visuals, types, and how to use them, click here for an introductory book on the ins and outs of visuals.
What are your favourite tips for introducing visuals?